Pages

Showing posts with label Ayumi Takahashi. Show all posts

Thursday, 28 November 2013

Apple Baby Hat: November challenge for Across the Pond Sew Along

Here is the Apple Baby Hat I made for this month's challenge for the Across the Pond Sew Along. The hardest part of making this hat was actually... taking the photos! It is so difficult taking photos of children, they move sooo fast. In the end I took some photos just of the hat, I was getting quite desperate!


The Apple Baby Hat is made using the pattern for the Dino-mite Hat from Patchwork, please! by Ayumi Takahashi. I just swapped the spikes for a quilted leaf and a fat stem.


Of course, the apple fabric helps give the idea too. The red and pink meant that I could use pink minky on the inside (to make it nice and warm) and pink velvet tags for tying the hat under baby's chin.


I think I just have to get faster at taking photos or take a thousand to get one good shot!
 It was fun though!


Amy Made That!...by eamylove


Sunday, 13 October 2013

Giant Prettified Pincushion - Zakka Along

OK, so I was joking, it's actually not a Giant Prettified Pincushion but a Giant Prettified Pincushion! The first time I saw the photo on the cover of Ayumi Takahashi's book Patchwork, Please! I thought I was looking at beautiful cushions. Afterwards I noticed there were pins stuck in one of the cushions and so... they were pincushions, of course! But the idea of the cushions stuck in my head and as this is the last day of the Zakka Along 2.0 and seeing as I've really enjoyed this sew along, I decided to make this fun project.


The pattern is enlarged by 380%! If I were to make the cushion again, I'd changed the proportion of the side panels, they came too high even though I used the same percentage to enlarge these too. Don't ask me how that happened, probably some problem with my maths!


This was the largest self-cover button I had but I would have preferred a bigger one and I was missing a mattress needle to pull the button more tight, through the thickness of the cushion, so I'll be fixing that soon.


Thank you to everyone who participated because I really enjoyed looking at your work in the Flickr group. I had no idea this was going to be so interesting. It's incredible how choosing different fabrics and thanks to everyone's personal style, you can get such incredible results, starting from the same project. I'm going to miss the Zakka Along... come on, I'm waiting for the next excellent Zakka book to be published, Please!


Saturday, 28 September 2013

Global Scrap Bee and a thank you for Patchwork, Please with centimeters!

Just in the nick of time, I managed to finish my block for the Global Scrap Bee. Adrienne at Chezzetcook Quilts' turn this month. She picked a Patchwork Wheel block (the tutorial is here at Don't call me Betsy), and some beautiful beach colours. I know it was supposed to be a scrap bee but I was missing some of the colours so I HAD to do a little fabric shopping!


At first I wasn't at all convinced it was going to turn out all right and it's harder making something for somebody else, isn't it? My biggest problem was definitely using inches! I realised I didn't have a ruler with inches on it. Luckily my mat has inches on one side so I managed to get the size right in the end! 
Thank you Adrienne for introducing me to the Patchwork wheel! I'm now making one for myself in black and shades of grey. Will be showing it soon... I'm hooked!


Speaking of inches and centimeters, I would really like to thank Ayumi Takahashi who used both in her book "Patchwork, please!". You have no idea how much difference this makes for somebody who's working in centimeters not to have to convert the measurements every single step of a project. I think that if you want to sell a book (or pattern) all over the world, you should consider this.


Thursday, 5 September 2013

Zakka Along - Happy Hexagon Trivet

Before the Phoenix flew off with my Happy Hexagon Trivet I managed to take a few photos! I'm very pleased with how it turned out. 


The trivet is quite hypnotic in black and white and I really enjoyed making it. It's my second paper-piecing project and the hardest part of it was removing the paper when I finished sewing it! Ayumi Takahashi's instructions in Patchwork, Please! are really good. The binding instructions in particular were very clear.


The back is fun too, it' not perfect but it looks quite good!


Monday, 29 July 2013

Zakka Kindle Pouch or Book Pouch - Zakka Along 2.0:: Patchwork, Please

Back again with my latest Zakka project. This time I decided to make a Kindle pouch for my Mum, using the Books-for-Baby Quilt template from Ayumi Takahashi's Patchwork, Please book. My Mum absolutely adores reading, she reads continuously. Over a year ago she bought a Kindle and takes it with her on holiday. To give it extra protection I thought I'd make her a pouch.

Eccomi di nuovo con il mio ultimo progetto Zakka. Questa volta ho deciso di cucire una busta per il Kindle di mia Mamma, usando lo schema per Books-for-Baby Quilt (quilt libri per Baby) dal libro Patchwork, Please di Ayumi Takahashi. Mia Mamma adora leggere, legge in continuazione. Piu' di un anno fa ha comprato un Kindle e se lo porta dietro quando va in vacanza. Per dare al Kindle un'ulteriore protezione contro gli urti ho pensato che avrei potuto cucirle una busta.


The pouch can easily become a book pouch too, if she wants to carry a book in her handbag! I might have to make one for myself because I'm always making books scruffy carrying them around all day in my messy handbag!

La busta può anche facilmente contenere un libro, se vuole portarsi dietro un libro nella borsa! Dovrei farmene una anch'io perché rovino sempre i libri portandoli in giro tutto il giorno nella mia disordinatissima borsa!


Saturday, 27 July 2013

Yum-Yum Apple Bib - Zakka Along 2.0:: Patchwork, Please!

At last I've managed to finish my Yum-Yum Apple Bib, straight from Ayumi Takahashi's book Patchwork, Please:


I had some fun apple fabric in my stash and I also had this larger scale apple fabric:


So I cut out four apples from this and sandwiched each strap end into two apples. I stitched over the stem with brown thread to make it stand out.
This is the fabric I used for the back:


The only problem I had was with the leaf: the first time I forgot I was supposed to cut the back of the leaf and tried turning it from the side, the second time I made it right but decided it was too small. The third and last time I was, at last, satisfied with the result. I added some batting inside to make the leaf stand out a bit more. Do these things just happen to me?!


I now have to test it with my 18 month old daughter!!!

P.S. Don't miss our two part giveaway to celebrate our 100th Blog Post:.


Saturday, 20 July 2013

Zakka Along 2.0: Dino-Mite Hat

This was a really fun project. If you have a toddler in your family (or friends have toddlers!) you absolutely have to try this one: the Dino-Mite Hat from Ayumi Takahashi's book Patchwork, Please!


It is:
1) really fun to make
2) fast to make
3) gives you a very professional result
4) gives you hours of dinosaur chasing games!

I risked it this time because I decided to use Minky dot fabric to give the effect of dinosaur's scales. I was really worried it was going to be too floppy as in the original project Ajumi had used wool, which can be quite stiff. Instead it worked beautifully and the spikes stand up straight. The fabric I used for the spikes is all "A walk in the woods" by Aneela Hoey for Moda. She has just come out with a new line called Hello Petal. I think this line will be really interesting to use because she's introduced, apart from her signature soft colours and drawings, very bold and dark colours too. Definitely adding this line to my Wish List!


I couldn't resist adding the tail with another spike at the end.
 What's a dinosaur without a tail?!


My model is Lucy but without Ella's help, none of these photos would have been possible. Lucy moves as fast as a Velociraptor!

Don't miss our fun 100th Post Giveaway - part one, which has just opened today and is running until Friday 26th of July.


Monday, 24 June 2013

Zakka Along 2.0 - Week 3: Teabag Pouch

Back again for Week 3 of Ayumi Takahashi's Patchwork, Please! Sew Along. This week two projects but I knew I'd only have time to make one so I decided to try the Teabag Pouch.


At last I found the perfect home for my cross stitch "I Love Tea" button! I made a lot of cross stitch buttons when I was on leave from work looking after Lucy, they were so relaxing to make (I've written about them here). The pattern is from the magazine CrossStitcher I often buy: it's really good and up to date with trends, very modern.


I've just noticed that the ric rac looks like steam coming out of the teacup in this photo! I love tags and I had this really pretty ribbon in my stash so I couldn't resist adding it. What's a cup of tea without a cake or a biscuit anyway?


The fabric is "TEAPOTS" by Robert Kaufman from the "Metro Cafe" collection. I love the colours and they inspired my choice of the solids too. I had to make a mock pocket to be sure I'd cut the teacup fabric the right size and position it correctly on the pocket. I'm glad I did because otherwise I would have wasted a lot of one of my favourite cotton prints trying to work out how to get it right!


Now time for a cup of tea!

Don't miss the Zakka Along 2.0 Flickr group, with new photos added every day, great fun seeing what everybody's doing! I'm linking up to Plum and June's Let's Get Acquainted Link Up at Heart of Charnwood and with the Zakka Along at LRstitched.


Monday, 17 June 2013

Zakka Along 2.0: Breakfast Placemat and Napkin

Week two for Zakka Aong 2.0 and the project was for Breakfast, Lunch & Dinner Towels. I must admit I cheated in this one. I've had some plain (and dreary!) linen placemats for a while now, thinking I could cheer them up some how. When I saw Ayumi Takahashi's project for lettered towels, I knew I had to try it on my placemats.


And this is the result! 
That is after solving a few problems:
1) First of all the fusible web wouldn't stick to the material. I discovered this after having ironed all the letters on the placemat and, after leaving it on one side for a while, I picked it up and three dropped off! I tried ironing with a new layer of fusible web but it still didn't work very well (swear I followed the instructions). So I decided it was the kind of material that was too rough.
2) I have a lot of scraps of Tanya Whelan's Dolce and I really like the colours, so I decided to use those. When they were just ironed on I thought they looked too pale and wouldn't stand out on the linen. Luckily the orange zigzag stitch seems to have made them stand out enough.
3) I realised I'm not so good at zigzaging around letters! I love the blanket stitch Debbie has used for her towel, next time I'll try that.


4) I was worried about the frying pan and egg, which I made in a smaller scale to fit the napkin, and not cover the whole thing. I thought they would be really hard to iron in the right place and to stitch around. I like the final result, they were actually easier to sew than the letters.


5) the binding: I cheated here too using ready made bias binding tape but I've promised myself I will use Ayumi's tutorial for making my own when I have more time.


6) Lucy, my sixteen month old daughter, stole the bowl with the cornflakes (really fast) and wouldn't give it back, just when I was trying to take the photos! I gave her some bread instead because it was actually dinner time.


Thank you for joining me for (pretend) breakfast!


 P.S. Thank you Daniele for your help with the photos!

 Linking up at Freshly Pieced for WIP Wednesday, Needle and Thread Thursday with Kelly at My Quilt Infatuation and Finish it up Friday at Crazy Mom Quilts.


Monday, 10 June 2013

Bell Pepper Magnets - Zakka Along 2.0: Patchwork, Please

I couldn't resist transforming what were supposed to be Bell Pepper coasters (read my last post for more info) into Bell Pepper Magnets. My daughter Lucy, 16 months old, loves playing with all the magnets on the fridge. It's a good way for teaching her words and colours (and keeping her busy while I'm cooking!).


 So what do you think? Do you like this mini version? I used a glue gun to fix the magnet inside. The central slice of pepper is top stitched by itself and then I used the glue gun to fix it to the main part of the pepper. I don't usually use glue guns for sewing projects because I consider it "cheating". This time I used it because I can't buy flat magnets here so I had to use a rather thick round magnet that I couldn't sew around. It makes the pepper look quite 3D in the end though!

Saturday, 8 June 2013

Zakka Along 2.0: Patchwork, Please!

Monday the Zakka Along 2.0: Patchwork, Please! started. The book is brilliant and I've been one of Ayumi Takahashi's fans for a while now, so I decided to join the Sew along. Her blog Pink Penguin is really cool and very followed even though she doesn't post very often. She invents stunning projects and has lots of clear tutorials.

Sew Along button

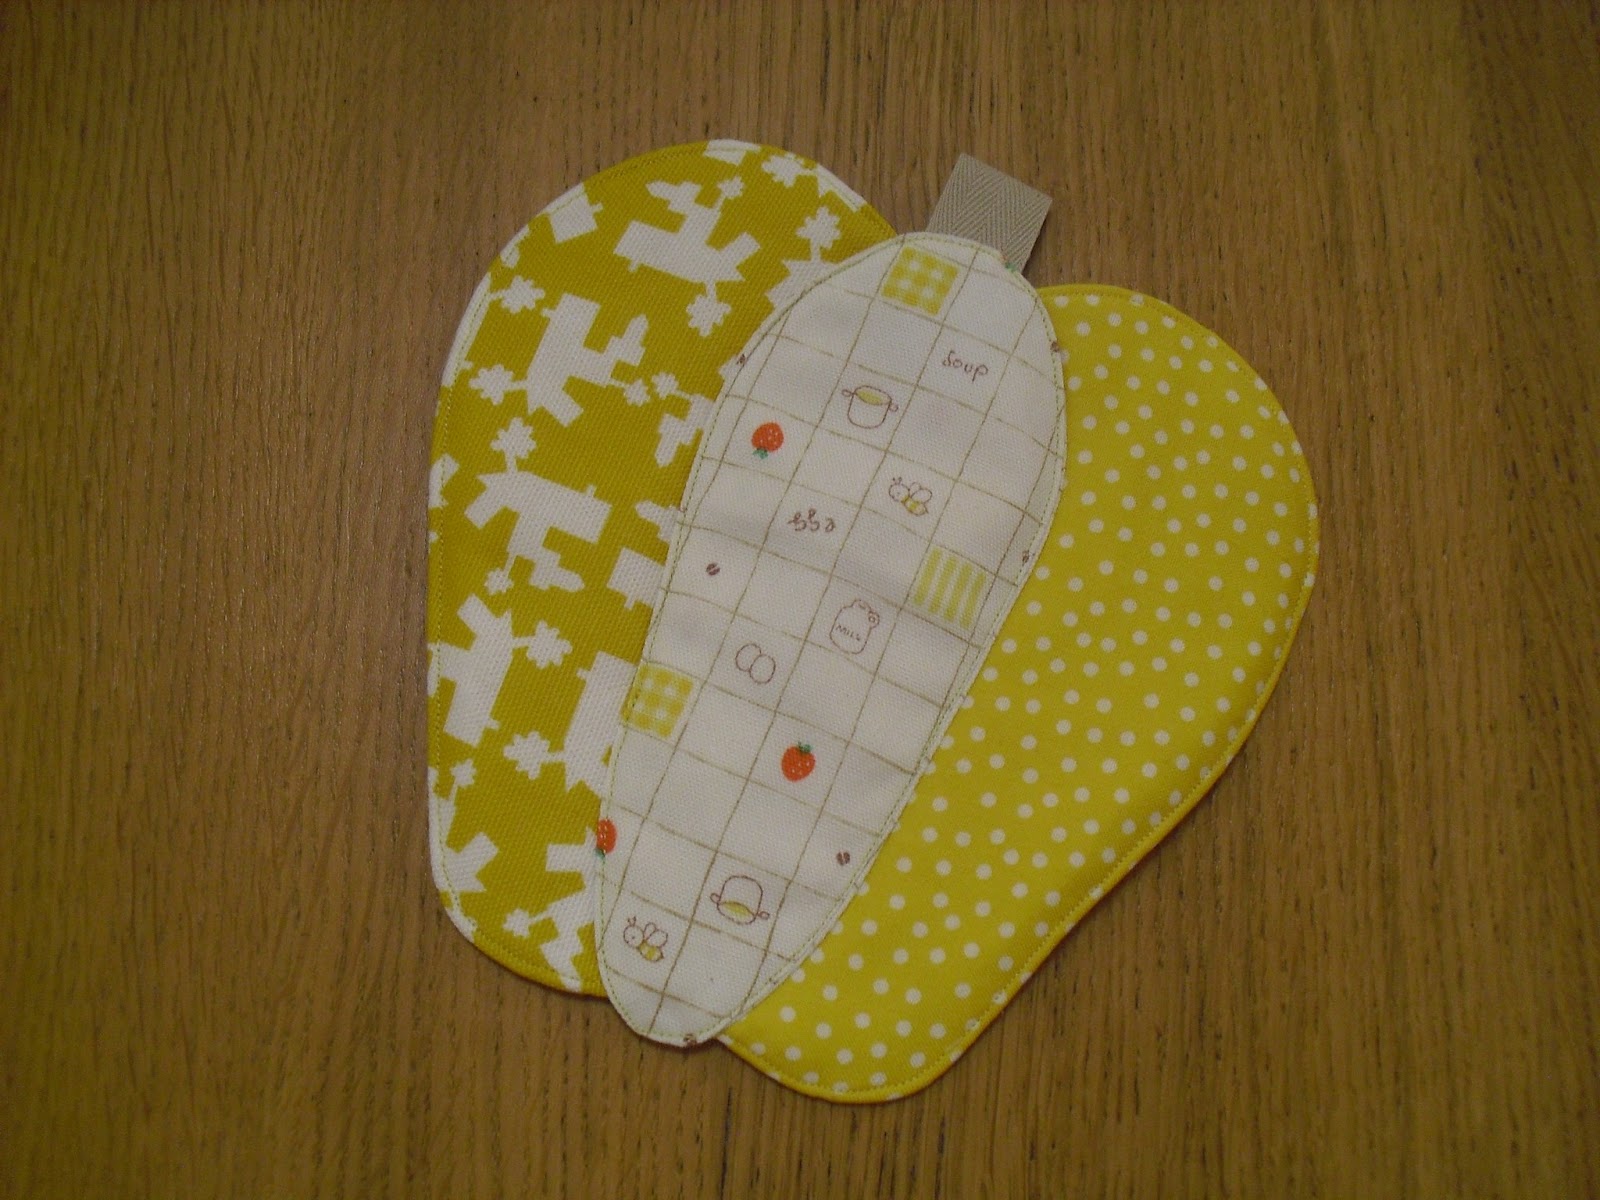
The first project is to make Bell Pepper Coasters (Sottobicchieri Pepperoni!). I thought I wasn't going to make these, no way. I don't even use coasters! I thought I would skip this week seeing as I haven't signed a contract or anything, have I?

Instead here I am, working late into the night making Peppers! Why? Thanks to  Penny at Sew Take a Hike: she suggested transforming it into a hotpad. And that's why I am making hotpad peppers! This is the first one: what do you think?

And of course not the only one, because once you start you can't stop!